


![The ultimate buyer’s guide for choosing the best TV [2023]](https://thenetick.co.ke/storage/2023/08/design-medium-360x180.jpg)


![5 Best AI Video Editor Tools [2023]](https://thenetick.co.ke/storage/2023/07/Featured-Image-360x180.png)


Taking a screenshot to capture a portion or the entirety of your display is simple. Perhaps you’d like to keep an online transaction, or perhaps you’d like to capture a memorable moment to show off to your friends. Windows 10 and 11 have the same built-in tools (Snip & Sketch and Snipping Tool), and you can snap a screenshot with a few keyboard commands.
I’ll show you how to take screenshots in Windows 10 and Windows 11 using both built-in Windows screenshot tools and alternative shortcuts, so you can chose which you prefer.
Snip and Sketch
Compared to the traditional Snipping Tool, the Snip & Sketch tool makes it easier to access, share, and annotate screenshots. It can now now take a snapshot of a window on your desktop, which was an unexpected omission when the program was first released and kept us using Team Snipping Tool until recently.
The keyboard shortcut Windows key + Shift + S is the quickest way to open Snip & Sketch. The Snip & Sketch tool is also included in the Start button’s alphabetical list of programs, as well as in the notification panel, where it is listed as Screen snip. If you don’t want to memorize the keyboard shortcut, you can simply search for it. (If you capture a lot of screenshots, we recommend pinning it.)
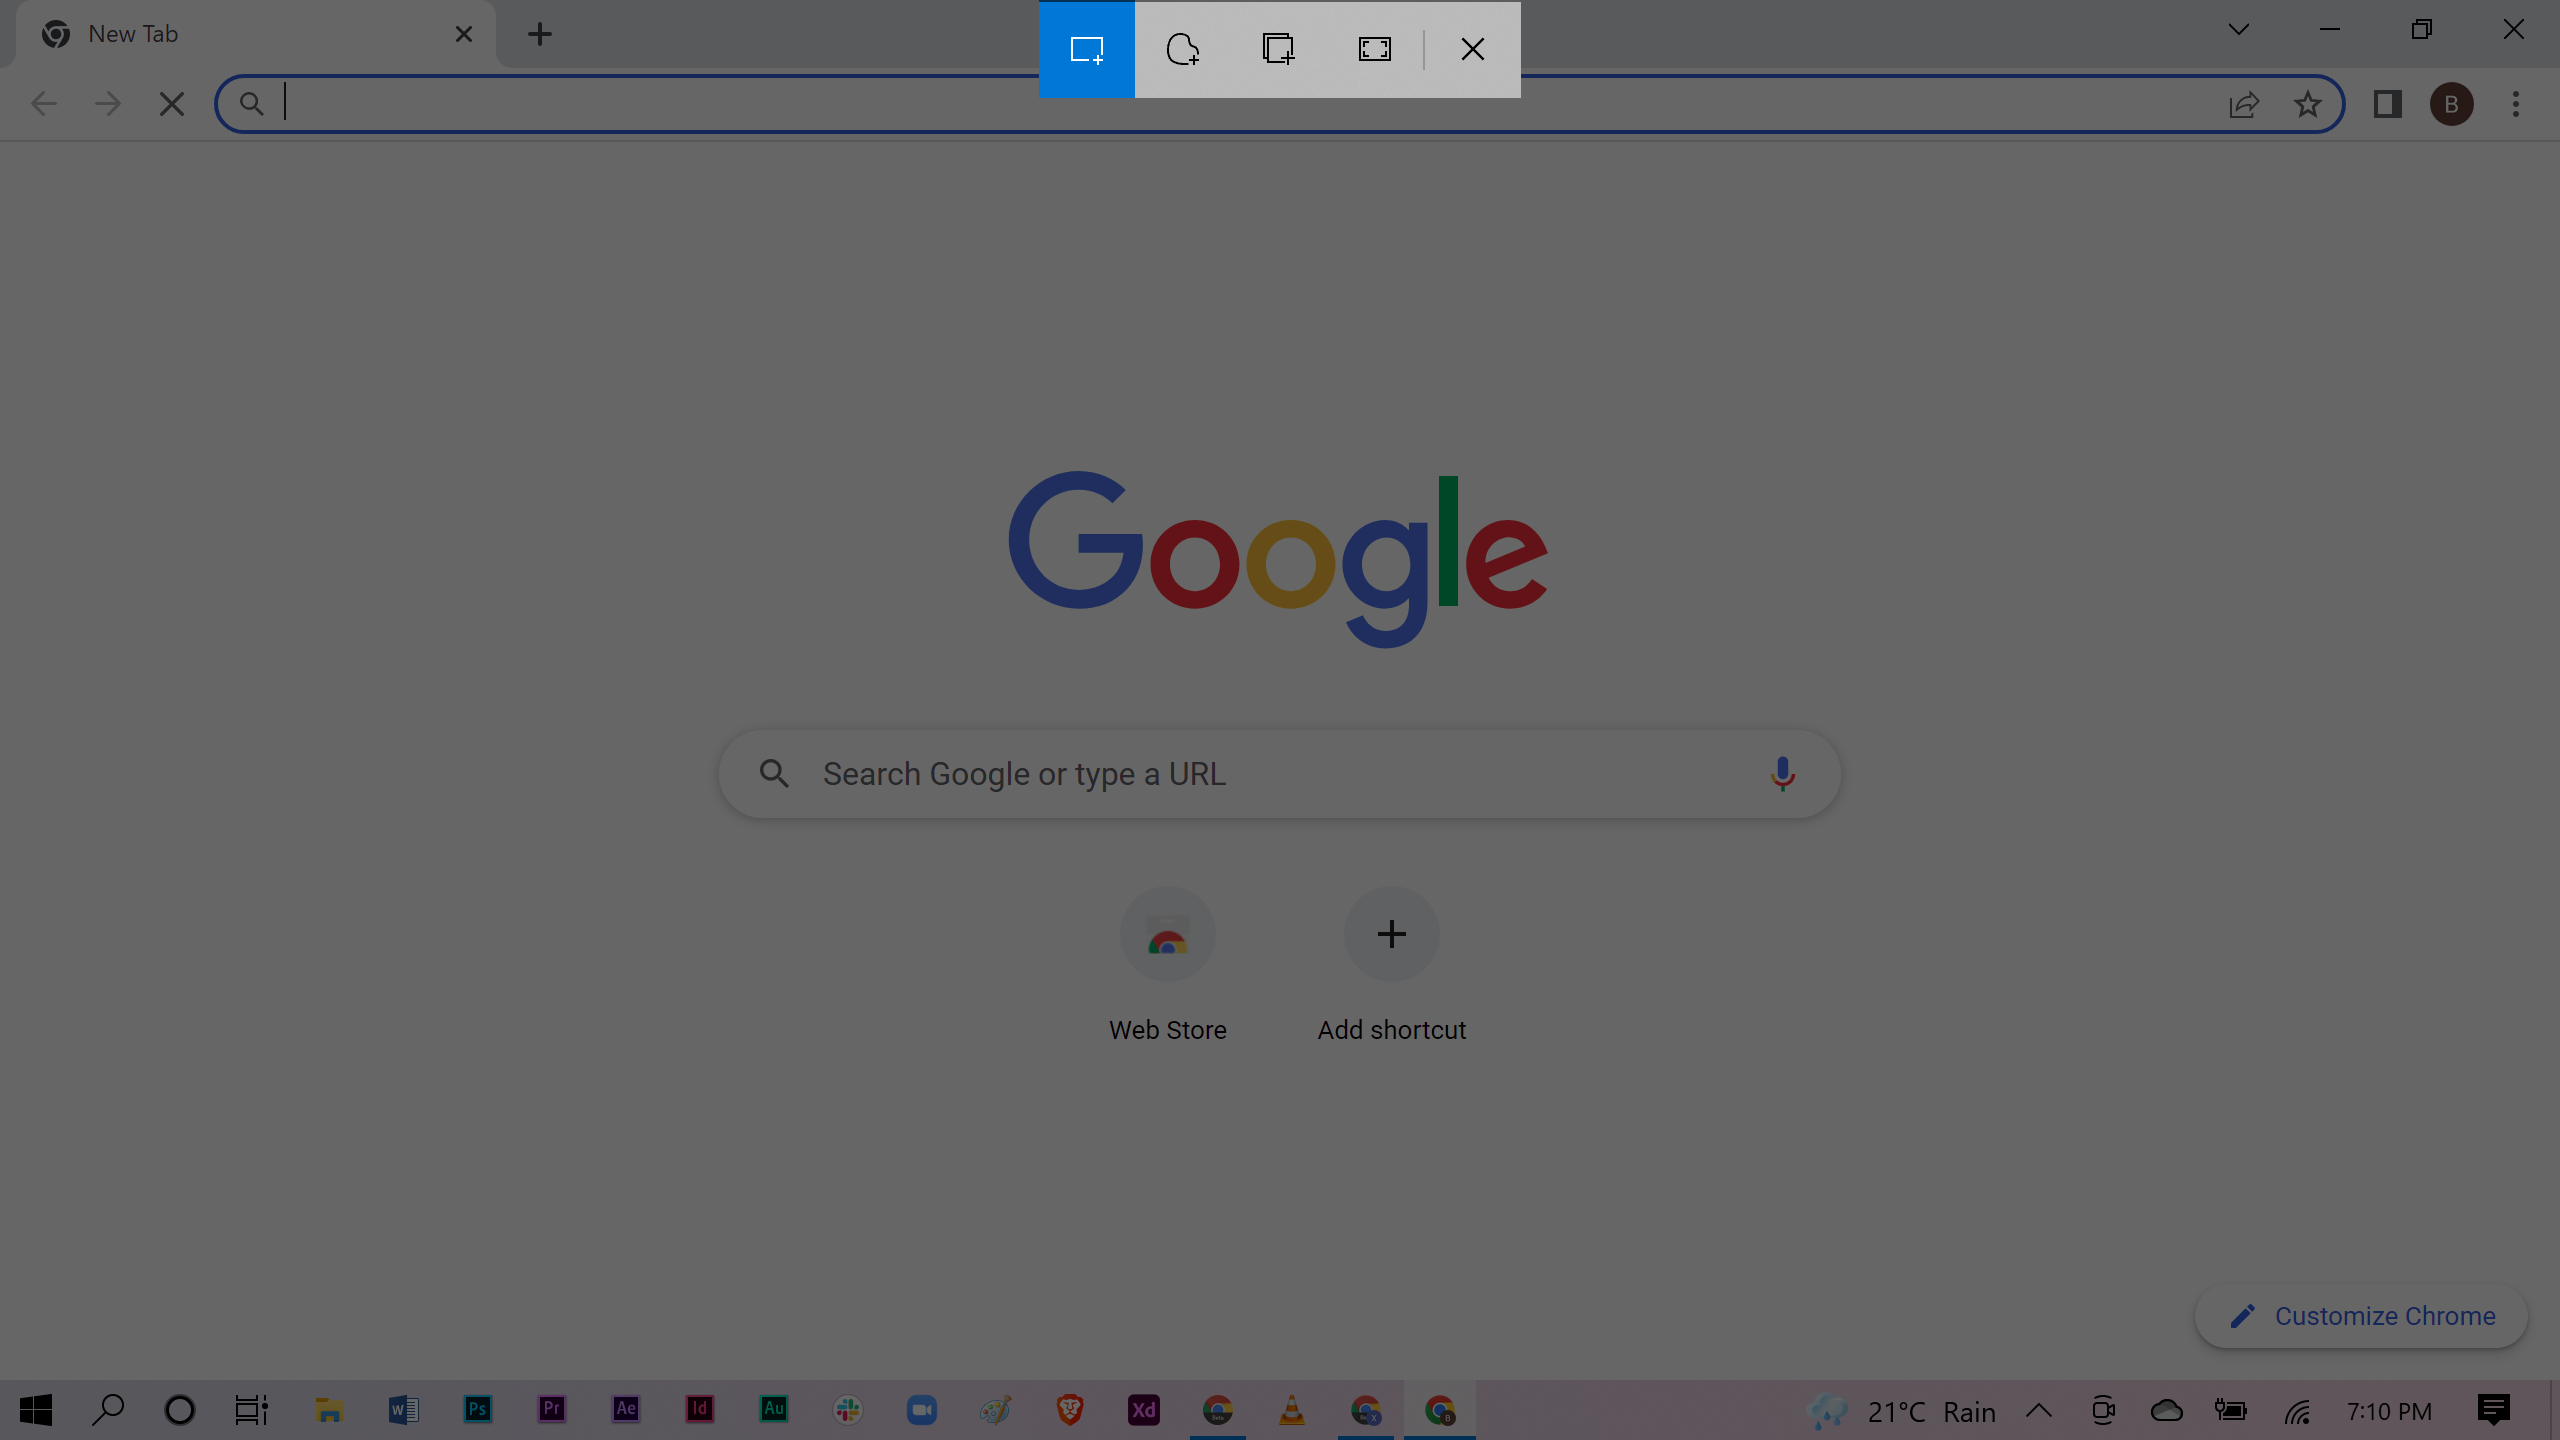
The keyboard shortcut or the notification button dims your screen and brings up a small menu at the top of your screen where you may pick between rectangle, free-form, window, or full-screen screenshots. Your screenshot will be saved to your clipboard and appear as a notification in the lower-right corner of your screen for a short time after you capture it. To edit, save, or share a screenshot, tap the notification to open it in the Snip & Sketch app. (If you don’t see the notification, open the notification panel and look for it.)
If you open Snip & Sketch from the Start menu or by searching for it, it will open the Snip & Sketch window instead of the small panel at the top of the screen. From here, you need to click the New button in the upper-left to initiate a screen capture and open the small panel. It’s an extra step to proceed this way, but it also lets you delay a screenshot. Click the down-arrow button next to the New button to delay a snip for 3 or 10 seconds.
Print Screen
To capture your entire screen, tap the Print Screen (sometimes labeled PrtScn) key. Your screenshot will not be saved as a file, but it will be copied to the clipboard. You’ll need to open an image editing tool (such as Microsoft Paint), paste the screenshot in the editor and save the file from there.
You can also set the PrtScn button to open the Snip & Sketch tool by going to Settings > Ease of Access > Keyboard and toggling on Use the PrtScn button to open screen snipping under Print Screen Shortcut.
Windows key + Print Screen
To capture your entire screen and automatically save the screenshot, tap the Windows key + Print Screen key. Your screen will briefly go dim to indicate that you’ve just taken a screenshot, and the screenshot will be saved to the Pictures > Screenshots folder.
Alt + Print Screen
To take a quick screenshot of the active window, use the keyboard shortcut Alt + PrtScn. This will snap your currently active window and copy the screenshot to the clipboard. You’ll need to open the shot in an image editor to save it.
Google Chrome Extensions/Third party apps
If you’re online, then extensions can also save you a lot of time. My favorite of them all is Awesome Screenshot. This is by far the best screen recorder and screen capture & screenshot tool to record screen considering all the functionality it has offer.
To use it;
- Go to Settings
- Go to Extensions and click Get more extensions
- Search Awesome Screenshot and click ADD TO CHROME
- It will show popup for Add app
- Once the add-on is installed then a lens icon will appear in your toolbar
- Click the Lens Icon to show you the Options
- Captures only what you can currently see in your current browser
- Capture selected area
- Captures the entire page
- Select a local image
- Capture desktop
- You can edit the screenshot with use of the toolbar,
- To use the Crop function select the area you want to crop and drag the corners, Click crop on the image
Anything else you would love to know? Talk to us via thenetick@gmail.com.


